Simple DIY Frozen Rock Art
- Mimi Jackie

- Jan 10, 2023
- 2 min read
Frozen rock art is so simple to make with your grandchildren or children and just as much fun too! While I was looking for several fun activities and crafts to do with our grandchildren at our cabin over the cold winter days, I found this idea and borrowed it from Little Pine Learners. For those of us that live in colder climates and are looking for unique ways to keep the kiddos occupied THIS IS IT. Frozen rock art makes a fun outdoor decoration and the designs you can create are not limited to snowmen. Using your rocks you can also design flowers, turtles, make a heart design or write inspirational words on your rocks. You could even add shells or dried floral petals!
Supplies:
Container
Water
Rocks
Sticks
Waterproof marker
Twine or cotton string
Steps:
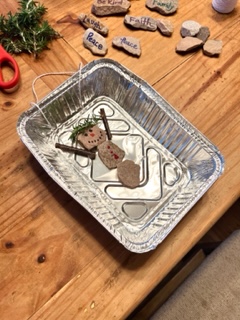
Using your markers, draw the snowman's face and buttons on the body.
Place the stones in your foil pan and add your sticks for arms. We also added greenery for a cute hat. You also want to add your twine or string to the container as well, allowing it to drape over the edge of the container for your hanger.
Add a small amount of cold water to cover the stones about half way. Don't overfill. After adding the water, you may have to reposition the twigs back into place.
Place your container in the freezer for a few hours to allow it to freeze. Make sure the container is sitting level.
After it's frozen, using the string, you can simply lift your rock art out of the container and bring it outside to hang on your favorite tree!


(variations shown above)
The fun is in the creating, and we hope this little craft will create lots of fun memories with your grandchildren on your next winter play date together.

Rediscover the beauty of winter!
xoxo
Mimi Jackie


Comments